


Teresa's Recipes
Onigiri (Japanese Rice Balls)
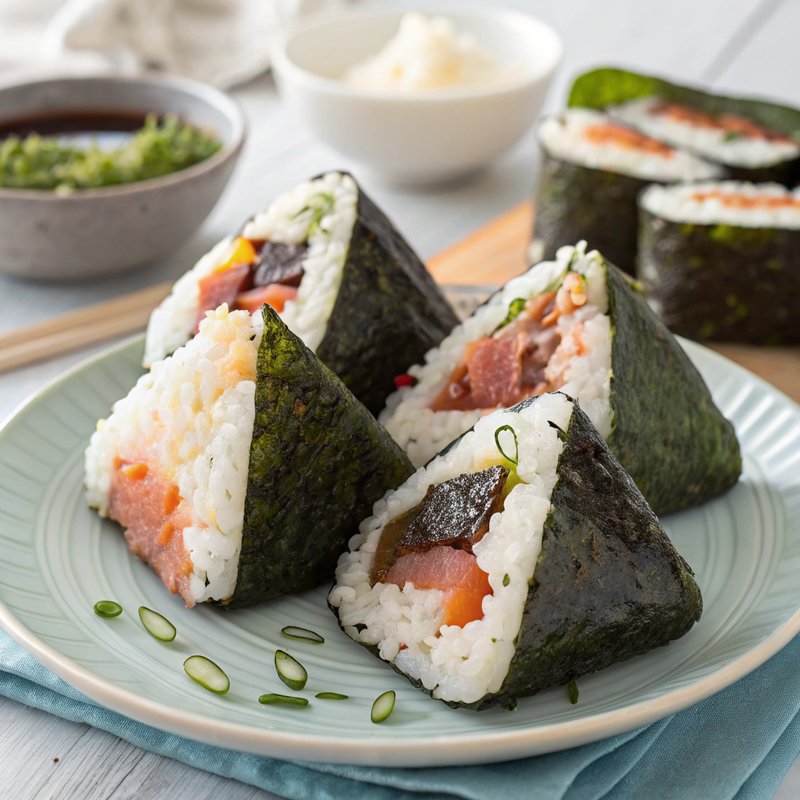
Onigiri, the delightful Japanese rice balls, are a beloved snack that beautifully combines simplicity and flavor. Traditionally shaped into triangles or balls, these portable treats are filled with a variety of savory fillings such as grilled salmon, pickled plum, or tuna mayo, and wrapped in a crisp sheet of nori seaweed. Onigiri has a rich history dating back to the Heian period (794-1185) when they were often made for travelers and soldiers due to their convenience and nourishment. Enjoy them as a quick snack, a picnic treat, or a charming addition to your bento box!
Ingredients
- 2 cups Japanese short-grain rice
- 2 1/2 cups Water
- 1 teaspoon Salt
- 1 cup (e.g., grilled salmon, pickled plum, tuna mayo) Filling of your choice
- 4 sheets, cut into strips Nori seaweed sheets
Dietary Notes
- Servings: 4
- Dish Type: Snack
- Prep Time: 30 minutes
- Cook Time: 30 minutes
- Calories: 200
- Fat: 2g
- Carbs: 42g
- Protein: 4g
- Sodium: 300mg
- Sugar: 0g
Instructions
- Rinse the Japanese short-grain rice under cold water until the water runs clear to remove excess starch.
- In a medium saucepan, combine the rinsed rice, water, and salt. Let it soak for 30 minutes to enhance the texture.
- Bring the rice to a boil over high heat, then reduce the heat to low. Cover the saucepan with a lid and cook for 15 minutes.
- Remove the saucepan from heat and let it sit, covered, for another 10 minutes to allow the rice to steam and become fluffy.
- While the rice is still warm, wet your hands with water and sprinkle them with a little salt to prevent the rice from sticking.
- Take a handful of rice and flatten it in your palm. Place a small amount of your chosen filling in the center of the rice.
- Gently shape the rice into a triangle or ball, pressing it together firmly to ensure it holds its shape.
- Wrap the onigiri with a strip of nori seaweed, shiny side facing outwards. This adds flavor and helps keep the rice moist.
- Repeat the process with the remaining rice and filling. If you're making a variety of fillings, label the onigiri for easy identification.
- Serve the onigiri immediately for the best texture, or wrap them individually in plastic wrap for later enjoyment. They can be stored in the refrigerator for up to 2 days.
Tips
- For an added flavor boost, consider mixing some furikake (a Japanese rice seasoning) into the rice before shaping the onigiri.
- Experiment with fillings like avocado, teriyaki chicken, or spicy mayo for a modern twist.
- If you're packing them for lunch, include a small container of soy sauce or wasabi for dipping.